Creating A List
Goals
Understand how the internet is made up of clients and servers.
Write some basic requests using JavaScript, jQuery and your browser's console.
Create a list and your first item.
Resumen
So far, we've learned about JavaScript, HTML, and CSS. These are the languages your browser understands, and it uses them to give structure, style, and interactivity to your website.
The problem, though, is that browsers don't remember anything. Every time you refresh a page, your browser reruns all of your CSS, HTML, and JavaScript. A browser, by itself, doesn't remember who your users are, or any of their information.
But wait, we need our website to remember things! Specifically, we need our website to remember all the items on our list, and whether we've completed them. That's where a server comes in. A server is a catch-all term for a web application that can be reached over the internet. They are often attached to databases that store information about their users. If you make an HTTP request with the correct URL (like http://www.google.com) and HTTP method (like GET or POST), the server will respond with helpful data.
Servers are written in dozens of languages, including Java, PHP, and Ruby. For this exercise, we've already built a server (using Ruby on Rails), and its available at https://listalous.herokuapp.com/. If you want to learn more about how to write a server, take a look at our Rails curriculum!
Browsers, like Chrome and Internet Explorer, are in the business of making requests to servers, and displaying the data they receive as a web page. Browsers are a type of client, which consume data. There are other types of clients, too. Your computer can be a client, using the curl command in the terminal. An iPhone is another type of client, and servers can even communicate with each other.
Every time you refresh a web page, your browser is making another request to the server. On modern websites, browsers often make multiple requests to a server, depending on what the user is doing. For instance, Twitter doesn't load your entire feed at once – as you scroll down the page, it's making more and more requests!
To accomplish that feat, websites can use JavaScript to make requests to servers, updating the page without the user having to refresh. This type of request is called an AJAX request, which stands for Asynchronous JavaScript and XML. It's a technique that is used by most major websites, to provide a seamless experience to their users.
In this lesson, we'll be making AJAX requests using our browser's console.
Pasos
Step 1
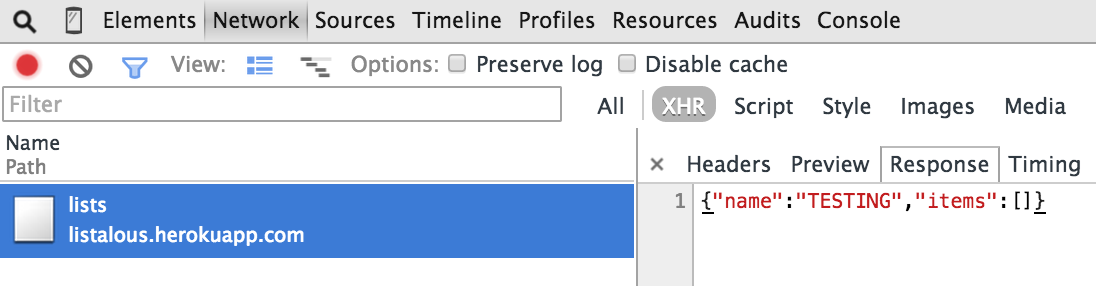
Copy the following code into your browser's console, replacing 'YOUR-LIST-NAME-HERE' with your name of choice. Note: it has to be unique! I'd suggest using your github username.
$.ajax({
  type: 'POST',
  url: "https://listalous.herokuapp.com/lists",
  data: { name: 'YOUR-LIST-NAME-HERE' }
})
Now click over to your browser's network tab. Next to the 'filter' box, click on either the 'All' tab or 'XHR'. Below that, click on the 'Response' tab. It should look something like this:
Find the request to listalous.herokuapp.com and click on it. Was it successful? If not, look in the console and read the error message. Why do you think it failed? Once you've successfully created a list, move on to the next step.
Step 2
Now that we've created a list, let's create our list's first item. We're going to use jQuery's AJAX function again to do so. Copy the following code into your browser's console, replacing 'YOUR-LIST-NAME-HERE' with your list's name, and 'DESCRIPTION-OF-YOUR-ITEM' with your item's description.
$.ajax({
 type: 'POST',
 url: "https://listalous.herokuapp.com/lists/YOUR-LIST-NAME-HERE/items",
 data: { description: 'DESCRIPTION-OF-YOUR-ITEM', completed: false }
})
Check the network tab again. Was your request successful? If it was, take a look at the server's response. You'll notice that the item has an id attribute now. This is how the server will uniquely identify your item in the future.
Step 3
Finally, lets fetch our list from the server. Your list application will need to do this every time someone refreshes the page, so that it can load previously created items. Copy the following code into your browser's console, replacing 'YOUR-LIST-NAME-HERE' with your list's name.
$.ajax({
  type: 'GET',
  url: "https://listalous.herokuapp.com/lists/YOUR-LIST-NAME-HERE/"
})
Check the network tab one more time. What data did the server send back? If your request was successful, it should have returned all the data associated with your list: your list's name, as well as all of your list's items. This is data will be basis of your list application!
Explicación
That was a lot of copying and pasting! What did it all mean?
Adding a Server to the Equation.
Remember, web pages have short memories. Whenever you refresh the page, all the HTML, CSS, and JavaScript on that page has to reload and rerun. A common way for a website to remember information about you (the fact that you have logged in before, your previous purchases, etc.) is by getting a server involved. A server, attached to a database, can persist information about your web site as users come and go.
In this case, we have a server that can be reached over the internet at https://listalous.herokuapp.com/. It's attached to a database that stores all lists and items, that can fetched to make hundreds of independent to do lists.
In step 1, we used jQuery's AJAX function to ask the server to make a new list in its database. It only did so if the list's name was unique; otherwise, how could the server tell your list apart from someone else's list?
In step 2, we asked the server to create an item associated with your list. The server responded with information regarding this item, including an id, that we can use to identify that item later (if we want to mark it as complete, or delete it.)
In step 3, we asked the server to return all information associated with our list, including all of the list's items. When we start building our list application, we will use this data to load all items on our list every time we refresh the page.
We did all of this in the browser's console. In the next lesson, we'll integrate some of this code into our site, so it runs automatically whenever a user visits your web site.
Next Step:
Go on to Loading Items