Other Pages

Expand All

Deploying To Heroku Again

If you haven't deployed your app to Heroku yet, start at Deploying to Heroku.

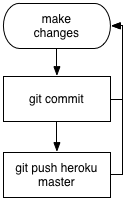
Step 1: Commit any pending changes to git

Heroku will only receive the files we've committed into our local git repository. So we need to make sure all changed files have been committed.

Type this in the terminal:
git status

git status shows you any pending changes you've created. If it has no output, you're already ready to deploy! Otherwise...

Type this in the terminal:
git add .
git commit -m "Some helpful message for your future self"

Your commit message should reference whatever your outstanding changes are: something like "Added votes to the topics index".

Step 2: Push changes to Heroku

Type this in the terminal:
git push heroku main

This takes all changes you've committed locally and pushes them to Heroku.

Step 3: Run database migrations on Heroku

Type this in the terminal:
heroku run rails db:migrate

This tells Heroku to run your migrations on its database, like running rails db:migrate locally.

Heroku's database is separate from the one on your computer, which means it needs to be updated every time you make changes to the structure of your database.

It also means that you'll not see any of the data you entered into the sqlite3 database on your computer.

Step 4: Visit your application

Type this in the terminal:
heroku open

This opens the new application in your browser.

Explicación

First, we had to do some work to make Heroku happy with our application. This required updating the Gemfile and bundling.

  • The Gemfile is a list of all the Ruby libraries your application needs. What we've declared here is that we want to use the sqlite3 library while we're developing on our computer (the development group) but when deploying to Heroku (the production group) we want to use the pg library, which is made for the type of database that Heroku uses.

  • Bundler is how Ruby projects keep track of the gems that they use. We told Bundler what we wanted to use in the Gemfile, now we need to make sure those gems are installed. Since we don't have the type of database Heroku does, we skip the production gems. Don't worry though! Bundler still logs them so Heroku will install them when they get your code.

You should be able to deploy your application any time it's in a good, working state. Your typical workflow will look like:

Diagram showing git workflow of making changes, committing them, and pushing to Heroku.
  1. Add or change some code

  2. Commit your changes (git commit)

  3. (repeat)

Any time your changes are committed, you should feel free to git push heroku main and boom! Your changes are live!